It's prom season and everyone wants to look great for the pictures, (you know your mum will be showing them to everyone for at least the next year!) so here are my tips on looking prom perfect.


First things first you want to make sure your skin is the best it can be so you have a nice base for your makeup! So in the weeks running up to your prom start doing deep cleanses, face masks and cleansing your face everyday. Products like Elemis Melting Cleansing Gel (£28.50) and the No.7 Skin care ranges are great!

For foundation and Primer you want to find some with no SPF in them to avoid the white cast you can get in flash photography, so products like Mac face and Body (£28.50), though it is quite sheer, you can built it up, or just conceal the areas you need more coverage, and it leaves a lovely finish to the skin. Also Nars Sheer Glow looks great in pictures (£30.50), the best primer that I've used it Smashbox Photo Finish Primer (£25.00), it creates a lovely smooth base for you to work on and isn't geared towards a certain skin type.


Another thing is to not close up your eyes, so I wouldn't recommend using a black eyeliner on your water line as that will close up your eyes, an alternative for this is using white eyeliner and that will open up your eyes and make them look bigger. I love the white eyeliner by MUA (£1.00) and it so cheap! I set it with a light eyeshadow to keep it on my water liner longer.

Lashes are also a good way to open uo your eyes and draw a lot of focus to them, for the most natural look individual lashes are your best bet but for more of a dramatic look strip lashes are great and their are loads of different styles to choose from, some of my favourites include Ardell Demi Wispies (obviously!) (£4.99) and Katy Perry Oh Honey Lashes (£4.69), both are quite natural but just add the right amount of length and volume and I love them!


Lips can make or break a look so, for prom I'd go for a pinky/nude! That way you can tell you have colour on your lips it finishes off a look if you make your lips look perfect with lip liner and really define the outer edges to they look clean, and with a lighter colour you don't have to worry about fading!

However sometimes a red lip is just the thing to finish off a look so, if red is what you're going for then I would recommend using a lip liner and a matte finish such as Ruby Woo by mac (£15.50), I know a lot of people hate how this feels on the lips but it lasts for ages which is really important for prom as you're going to be having a lot of pictures taken and don't want to be worrying about what your lipstick is getting up to!

To finish off I would use a powder, I like mac mineralise skin finish natural, but just use whatever is your favourite. This will keep your make lasting longer and make sure you're makeup doesn't look shiny in pictures!

Thanks for reading I hope this helped, and if its your prom I hope you have a fabulous time! :)

Charlie xo
Follow on Bloglovin


I never thought that leaving college would mean I'm ten times busier than when I was their but I'm happy that I am. This week I've had a lot of makeup work do to, I've had weddings, hen do's, proms and also have been working on set of The Addams Family musical everyday this week! So it's been hectic (which explains the lack of blog posts) but a lot of fun. So today I have a bit of free time so I'm going to be writing about the things I've been loving over the past month!... I also have one thing that I didn't like right at the end!


My first favourite is this lipstick by mac in creme cup (£15.00), I've been wearing this lipstick almost everyday on top of a darker lipliner (which is my next favourite) to create sort of a gradient look and I really like it. I can't rave enough about mac lipsticks just in general and this shade is the perfect nude for me :)


Next is the lip liner I've been wearing almost everyday paired with the lipstick, and it is the Rimmel Lasting Finish lip pencil in 011 spice (£2.95). I really like this lip liner, It's very creamy and has a good lasting power, the colour is a dark pinky shade and it looks lovely on most skin tones, and for for the price you can't go wrong!


Individual lashes in general are a favourite this month, I love the look of them, they're really natural and stay on a lot longer than strip lashes do, you can get them in a range of sizes and colours depending on what look you're going for, however I do recommend going to a professional to get these done as the glue is quite strong and it's tricky to put them on by yourself!


Words can't describe how much I love this foundation! It's the Chanel Vitalumiere Aqua (£33.00). You only need a little bit of this to cover your entire face and it just blocks out all of your imperfections and discolouration, it leaves your skin with a dewy look which I personally really like :) I know it's quite expensive so it's not going to be everyones cup of tea but for a makeup lover I think it's worth the investment haha


My last favourite is Benefit Coralista blush (£23.50), I love this shade and I've been it wearing a lot myself and also using it on clients, it suits almost everyone and it easy to wear both really natural and if you want to build it up and wear it more dramatic you can! Also it has a very pleasant smell to so that's a plus! hahaha


And the last thing is something that I have not been loving at all this month and that is the Eyeko skinny liquid liner in black, this eyeliner is terrible to say the least, you can't go over the eyeliner you've already done because it wipes off all the product if you try to do a second layer, even if you leave it to dry, so it's really hard to get a nice wing and I've only had it for about three weeks and it already drying up! Not good haha If you have and pen eyeliner recommendations please let me know in the comments I'm looking out for a good one! :)

Thanks for reading, let me know what you've been loving in June and if you've tried any of these products! :)

Charlie xo
Follow on Bloglovin

Whilst I was on holiday I realised makeup was somewhat useless and anything I put on my face completely vanished with in the hour! That being said when it got a bit cooler at night I did like to put on a little bit of makeup so I could wander about with out scaring the children! haha So here is what I used and the products I found lasted through the heat.


So first off for my face I use The Body Shops All-In-One BB cream (£12.00) and Extra Virgin Minerals Powder Foundation (£15.00). I love the BB cream it's one that matches to your skin tone, although when you first apply it I find it goes quite orange and then seems to calm its self down! haha and to give it a bit more staying power I then apply the powder foundation over the top, this powder is very lightweight so it doesn't look cakey or over done and just makes the BB cream last a little longer.


For eye makeup I find it sticks a lot better if you use something to prime to the eyes, such as a primer, urban decay do amazing primers like the Primer Potion (£16.00), or things like a cream eyeshadow such as the Maybelline EyeStudio Colour Tattoo (£4.99). These will make the eyeshadow last longer and prevent it from creasing. The eyeshadows I reached for a lot were two from the Stila In the Light Palette (£25.00). The colours "kitten" and "bliss" were my go to!


My two favourite waterproof products were the 100% waterproof mascara by Rimmel London (£5.29), this helped keep my eyelashes curled all day (which is a hard task with my poker straight eyelashes) and it didn't smudge all day! For eyeliner I found myself loving the Stila Smudge Proof Eyeliner (£13.00) in damsel, when it says 'smudge proof' that's exactly what it means! Once it's on your eyes this stuff isn't going anywhere, perfect for the hot weather!!


For lips I kept it quite simple, using Niveas Sun Protect Lip Balm (£3.29), which works wonders! No.7's Lip Liner in nude (£6.75), my favourite shade of lip liner of all time, it's a 'my lips but way better' sort of shade! And lastly Mac Lipstick in Creme Cup (£15.00), which is a lovely pink/nude shade which leaves a subtle shine on the lips.

I hope you enjoyed this and have more of and idea of what makeup works in the sun. One last thing before I go, I've been working on my facebook page 'Charlotte Racz MUA' and it would be great of you could check it out and like it. Feel free to message me for appointment if you live around the Manchester Area!! I'm also having a giveaway when I reach 100 likes so it would be worth a like even if you live far away haha thanks for reading :)

Charlie xo
Follow on Bloglovin

FLASH // NO FLASH
I feel like everybody has their own way of contouring, how much product to use, where to place it and which type of products. So today I'm going to be sharing a way of cream contouring that I've found works best for myself and clients! I'd choose cream contouring over powder as it gives a more natural result. Also sorry for the bitch face in the first picture the flash was to bright to actually open my eyes hahaha


source
So first you need products I recommend getting two shades of your favourite concealer, the highlight shade needs to be two shades lighter than your natural skin tone and the contour shade should be two shades darker. The products I used where a little to greasy for my liking, I would say a product like mac select cover up concealer (£15.00) would work wonders for this.

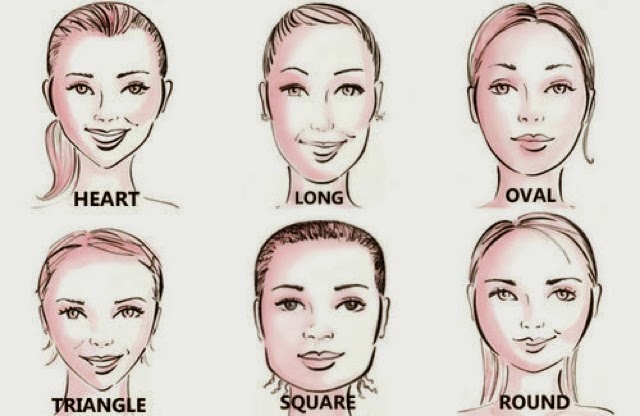
The point of highlighting is to bring features forward so apply it to all the areas that the sun would naturally catch and the areas you want to enhance and contouring pushes the darker parts of your face back so apply this to parts of your face that you don't want to catch the eye. In hairdressing and makeup the "perfect" face shape is an oval, so with contouring you want to make your face look as oval as possible (my face shape is round by the way!).


HIGHLIGHTING
1. So I start off putting a thin strip of highlighter down the centre of my nose and a small circle right on the end if it, this is going to help make my nose appear smaller and thinner (I hate the shape of my nose so this helps a lot haha)
2. I then apply it above my nose in the centre of my forehead as the sun would naturally hit this part of my face.
3. To brighten up the eye area (the inner corner of my eyes are ridiculously dark!) I put this in a triangle shape underneath them, winging it up to my temple and down to the apples of my cheeks, this helps lift that area as well making you look more awake.
4. I put a small bit just above my lips on my cupids bow to make my top lip appear fuller and dab a little on my chin.
5.Once I've done that I apply this on my brow bone (at the highest point underneath my eyebrow) and above my eyebrow at the arch, I then blend a bit of it upwards to give the impression of a higher arch.
5. To make my face shape more oval I apply a line of highlighter under my cheek bone below where you would contour with a dark shade and this helps to elongate that part of my face.
6. I didn't do this but you can also add highlighter on the laugh lines around your mouth if you feel they are a problem.


CONTOUR
1. I then apply the contour shade, which unfortunately you can't see quite as well, down the sides of my nose. I do this in very thin lines as if you cover all of your nose it will actually end up making your nose appear bigger!
2. Around my hair line on my forehead, focusing more on the temples. This will give my circle face shape more of an oval look.
3. Under my cheek bone, this just makes your cheekbones look more prominent and thins down your face.
4. Around my jaw line and the sides of my chin, this will get rid of any double chin business and elongate the chin making it appear oval.
5. If you have thin lips or the top is larger than the bottom then you can also add a bit of contour under your bottom lip and it will add a "shadow" making it look fuller, but my lips are quite bottom heavy so I didn't do this part!
6. You could also add a small horizontal line above the circle shaped highlighter on your nose, this will give the effect of a button nose but I personally don't like how this looks on me!


BEFORE // AFTER
Once you've done all of that you want to blend it all together, my favourite brush to use for this is the real techniques buffing brush (£21.99) from the core collection and just blend until everything is seamless, a good tip is to take a photo of yourself with the flash on and then the flash will pick up any harsh lines that you can't see normally. Once it's all blended you can see where to add more of needed or if you're happy with how it looks you can just finish your makeup as normal setting the cream contour with a powder or makeup setting spray.

And their you have to how to contour like the professionals! I hope you enjoyed thanks for reading :)
Charlie xo
Follow on Bloglovin
I recently went on holiday and like many other people I am one to over pack! So I thought I'd write about some of the things I took that actually come in handy, I probably could have taken half of the amount and wouldn't of missed anything!


So first is face wipes, I wouldn't recommend these specific ones as they weren't the best but I used face wipes every single day, either to take off my makeup at night as they are much more efficient to pack than a bottle of cleanser or I use them around the pool just to freshen up. Face wipes aren't the best for your skin so make sure you wash your face at night aswell!


Next are travel size shampoos and conditioners, I went for a week used these every other day and still have a bit left in them (I also so two shampoos every time I wash my hair!) so you shouldn't need much more than this and it saves up so much room and weight in your suit case!!... and then you can pack even more unnecessary things!


If you're going somewhere hot this is really important, Aloe Vera works for burns, insect bites and just soothing any irritations. I got a bit burned on my back and little on my face and I applied this at night and the redness was gone by the morning and it wasn't at all sore, definitely a must if you burn quite easy!


Another thing for the sun is lip balm with an SPF, my lips burn like nobodys business and with this they didn't burn at all! It doesn't do the best job of actually moisturising your lips but then again it doesn't say that it will haha


And the last things are just palettes in general, they're so much easier and take up a lot less room than packing say four single eye shadows with large packaging and also you get more variety taking palettes! Also if you take a concealer palette it wont matter about what shade you take if you get a tan because you'll have a lot of options.

And there you have it, some of me travel essentials! Let me know what you always pack if your going away. Thanks for reading I hope you enjoyed :)

Charlie xo
Follow on Bloglovin
It feels like forever since I've written a blog post! I've been in Tunisia for the past week and had all of my posts scheduled so I haven't been online much and when I did try everything was written in Arabic and also backwards! So I had no chance haha but now I'm back and I'm going to share the makeup products I bought at duty free!! AKA my favourite place on earth.


So first I have Chanel Vitalumiere Aqua Foundation (£33.00), this was around £29.00 in duty free. I've been wanting this foundation for ages and mine is in the shade 10 Beige which I think is the lightest and I love it!! It's so light on your skin and the colour is very neutral it's not too yellow or too pink, it gives your skin such a lovely even look, it's light coverage but it gets rid of any discolouration on your skin and leaves it looking very dewy.


Next I have Benefit Coralista Blush (£23.50), this was £19.50ish in duty free. I have had my eye on this blush for so long but for some reason just never picked it up and once I saw it in duty free (I went a little crazy) the discount went to my head and I got it haha. This blusher looks amazing with a tan and I think it would still look lovely on fair skin its a pinky coral shade with a really nice shimmer to it!


This product is Mac Lipstick in Flat Out Fabulous (£15.00), around £12.00 duty free. It's a retro Matte finish which im not entirely sure how that's different from the matte ones but it's lovely all the same, I'd say it was the same texture as Ruby Woo which I know alot of people don't like, but personally I love it as it will last all day and when I'm working I don't really have time to sit down let alone try and re-apply my lipstick so this works perfect! I wore it today and was working on two weddings from 8am until around 2pm and I didn't re-apply once and it lasted all day!


And last but certainly not least is this Chanel Lipstick in 317 La Precieuse (£26.00), this was £21.00 in duty free, I have been wanting a red Chanel lipstick for so long its unreal and everyone whos close to me knows this so I was in duty free and my eyes almost popped right out of my sockets when I saw this! It's so so so so so pretty I am in love with the colour... even if I only used the sample one because I can't bring myself to spoil how pretty it looks all new and flawless, I will do a full review when I pluck up the courage to actually put it on my lips! haha

And that's all of the things I bought from duty free, I think I can say that I enjoyed makeup shopping just as much as my holiday... actually maybe a little bit more :/ I have a problem I know hahaha Thanks for reading I hope you enjoyed!! :)

Charlie xo
Follow on Bloglovin
Today I'm going to be writing about my desert island must haves! So if was trapped on a desert island and I could only take 5 things this would be what I would take! (beauty wise) Although if I was planning what I was taking I have no idea why I'd be going to a desert island by myself....However thinking about it too much wouldn't make for a good blog post now would it!! Also these aren't my makeup essentials but if you like I could also do a makeup edition!


First off I have suncream, Now this one just screams obvious, most people know how it feels to get burnt and it is h o r r i b l e!! I do not plan on being stranded forever on a island burnt to a crisp. I feel that would really make a bad situation a lot worse so I would lather myself in this day in and day out! haha


Second I have plasters, now I'm hoping I could also bring shoes with me so these could be for blisters or minor injuries cutting down coconuts...with my knife that I didn't pack either. You just never know, I don't want to get sand in my wounds so my plasters would be in my bag!! Also they're waterproof, I could step in a puddle and no one would ever need to know.


Next I have shower gel, since I'm not dead on this island I'm guessing that clever little me has found some water. wahoo. And since I have water I'm going to want to wash myself, you know so I don't smell bad for when my guest's come round. I thought that shower gel would be a good idea as I could also use it as shampoo!


And the last two things I would pack are tweezers and a pocket mirror. I know I'm stranded and alone but you've got to keep ahead on your eyebrows!! I can only imagine how horrific they would be if I left them to grow for any longer than a week or two... safe to say I could probably blend in with the wildlife so these two would be a lifesaver!!

I hope you enjoyed this post, it was more for fun than most of my others! Let me know what beauty things you would pack if you were to get stranded on a desert island. Thanks for reading :)

Charlie xo
Follow on Bloglovin

Like most people I hate feet! They look weird and gross and if you have to wear sandals you should paint them piggys! So today I'm going to be showing you how I do my summer pedicure for flip flop ready feet!!


First off I use an exfoliator either in the bath or shower, the one I'm currently using is Gorgeous by Gok Body Polish (£17.99 for the set), this is just to remove any dead skin off your feet and make them feel soft. I absolutely love this exfoliator first of all the smell is amazing!! It smells like almonds and heaven and all things good haha it also does a really good job of getting rid of dead skin and isn't too harsh on the skin.


After I get out of the shower I then moisturise my feet, my favourite lotion for this is the Soap & Glory Heel Genius (£5.50), as with all soap & glory products this one is fantastic, it keeps your skin feeling so soft and it has a really nice scent to it as well and also it's so cheap!!


Then you just want to file your nails and buff them, also add a base coat if you like. I used Blue Lagoon by Revlon (£4.76) and a pink Clinique colour that has no name... for some reason! But I'm sure you can find similar it's just a baby pink shade! I also added some gems (£2.99) to my nails to give them more of a summer vibe!


Here is what my nails turned out like! I tried to make them look socially acceptable for the internet so I also put on shoes for your benefit haha I hope you liked this, thanks for reading! :)

Charlie xo

I have another Ted Baker Product review for you today, this one is on the bronzer from the same gift set as before. Well I'm guessing it would be classed as a bronzer however it's one of those blusher/bronzer/highlighter confusing products! The first thing you notice is how gorgeous the packaging of this product is! It's a lovely mirrored rose gold case.


Inside it has a very handy mirror and the product has the 'TB' symbol in it, it has two different shades of the product both are on the tan side of blusher and they have a lovely shimmer to them! I use these products as separate colours or I mix the two together and both look great!


This product is very pigmented and a little goes a long way, it's also quite powdery so you have to be quite careful and light handed with your brushes! Saying that if you do apply too much of this product it is very easy to blend out and correct, just use a clean brush and it looks fine. When I got this product (the pictures aren't of it new) it had a very glittery layer over the top but one you swirl your brush over it once all of that goes away and it just has a shimmer to the product after that.


As you can see this product leaves a really nice glow on your cheeks, I use it as a blusher and it adds a highlight as well. Its a lovely colour, this is with all of the colours in the product mixed together. It lasts for quite a long time on the cheeks and also as it's more of a peachy tone and less pink it gives you a bit more of a tan to the face, so it's lovely for summer or for a night out!

I hope you enjoyed, let me know if you've tried any Ted Baker products! Thanks for reading.

Charlie xo

Every once in a while it's fun to dress up and play around with your makeup, so today I'm going to show you how I do my (very easy) dramatic smokey eye, using the naked palette, eyeliner and mascara! Hope you enjoy...


First off I primed my eyes with Urban Decays Primer Potion (£16.00), I then put a thick line of Maybelline Eye Studio Gel Liner (£7.99) on the lash line an blend it out with both a pencil brush and a big fluffy brush up to the crease. Repeat this step until you are happy with the out come, I did this twice.


I then took a mixture of 'Naked' and 'Buck' from the urban decay naked palette (£37.00) on a large fluffy brush and blended that along the crease to make sure their were no harsh lines anywhere.


I then took 'Virgin' from the same palette on an angled eyeshadow brush and put that colour under the brow bone and in the inner corner of the eye. I also took 'Creep' on a small pencil brush and blended that out on the lower lash line to give it more of a smokey look.


After that I added Soap and Glory supercat eyeliner (£6.00) on the upper lash line and winged it out a little bit, I really like the applicator on this eyeliner pen but it does run out quite fast! I also added a bit of the same gel eyeliner from before on the tight line and the water line :)


I then finished off the look with No7 Exceptional Definition Mascara (£11.50), I would normally add false eyelashes to this look if I was wearing it out but I didn't have any plans so I didn't use them, but I would recommend using some lashes as they will make your eyes look bigger and a smokey eye can sometimes make them look quite small. (I also mixed up the two pictures! :( the one above shows the mascara and this one shows the eyeliner, oopsie!!)


And here is the finished look altogether! Foundation is Body Shops BB Cream, cheeks are Two Faced Sweethearts Blusher and Lips are Rimmel Moisture Renew Lipstick In Dark Night Water-Oops.

Thanks for reading if you try this look tag me on Instagram - @CharRacz :)

Charlie xo