How to Cream Contour Like a Pro!

/
0 Comments

FLASH // NO FLASH
I feel like everybody has their own way of contouring, how much product to use, where to place it and which type of products. So today I'm going to be sharing a way of cream contouring that I've found works best for myself and clients! I'd choose cream contouring over powder as it gives a more natural result. Also sorry for the bitch face in the first picture the flash was to bright to actually open my eyes hahaha


source
So first you need products I recommend getting two shades of your favourite concealer, the highlight shade needs to be two shades lighter than your natural skin tone and the contour shade should be two shades darker. The products I used where a little to greasy for my liking, I would say a product like mac select cover up concealer (£15.00) would work wonders for this.

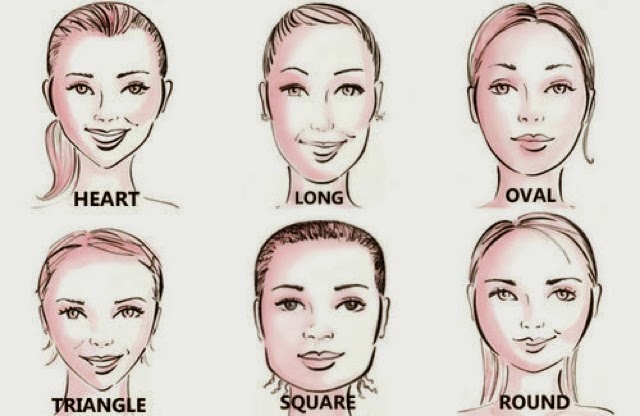
The point of highlighting is to bring features forward so apply it to all the areas that the sun would naturally catch and the areas you want to enhance and contouring pushes the darker parts of your face back so apply this to parts of your face that you don't want to catch the eye. In hairdressing and makeup the "perfect" face shape is an oval, so with contouring you want to make your face look as oval as possible (my face shape is round by the way!).


HIGHLIGHTING
1. So I start off putting a thin strip of highlighter down the centre of my nose and a small circle right on the end if it, this is going to help make my nose appear smaller and thinner (I hate the shape of my nose so this helps a lot haha)
2. I then apply it above my nose in the centre of my forehead as the sun would naturally hit this part of my face.
3. To brighten up the eye area (the inner corner of my eyes are ridiculously dark!) I put this in a triangle shape underneath them, winging it up to my temple and down to the apples of my cheeks, this helps lift that area as well making you look more awake.
4. I put a small bit just above my lips on my cupids bow to make my top lip appear fuller and dab a little on my chin.
5.Once I've done that I apply this on my brow bone (at the highest point underneath my eyebrow) and above my eyebrow at the arch, I then blend a bit of it upwards to give the impression of a higher arch.
5. To make my face shape more oval I apply a line of highlighter under my cheek bone below where you would contour with a dark shade and this helps to elongate that part of my face.
6. I didn't do this but you can also add highlighter on the laugh lines around your mouth if you feel they are a problem.


CONTOUR
1. I then apply the contour shade, which unfortunately you can't see quite as well, down the sides of my nose. I do this in very thin lines as if you cover all of your nose it will actually end up making your nose appear bigger!
2. Around my hair line on my forehead, focusing more on the temples. This will give my circle face shape more of an oval look.
3. Under my cheek bone, this just makes your cheekbones look more prominent and thins down your face.
4. Around my jaw line and the sides of my chin, this will get rid of any double chin business and elongate the chin making it appear oval.
5. If you have thin lips or the top is larger than the bottom then you can also add a bit of contour under your bottom lip and it will add a "shadow" making it look fuller, but my lips are quite bottom heavy so I didn't do this part!
6. You could also add a small horizontal line above the circle shaped highlighter on your nose, this will give the effect of a button nose but I personally don't like how this looks on me!


BEFORE // AFTER
Once you've done all of that you want to blend it all together, my favourite brush to use for this is the real techniques buffing brush (£21.99) from the core collection and just blend until everything is seamless, a good tip is to take a photo of yourself with the flash on and then the flash will pick up any harsh lines that you can't see normally. Once it's all blended you can see where to add more of needed or if you're happy with how it looks you can just finish your makeup as normal setting the cream contour with a powder or makeup setting spray.

And their you have to how to contour like the professionals! I hope you enjoyed thanks for reading :)
Charlie xo
Follow on Bloglovin


You may also like

No comments: